Photographing Six Minutes of Totality
Most eclipse photographers get ninety seconds and one chance. Egypt gives you up to 6 minutes 23 seconds with the Sun almost overhead: the most forgiving totality of the century so far, provided you have solved one awkward geometry problem before you arrive.
Why 2027 is an unusually forgiving eclipse to photograph
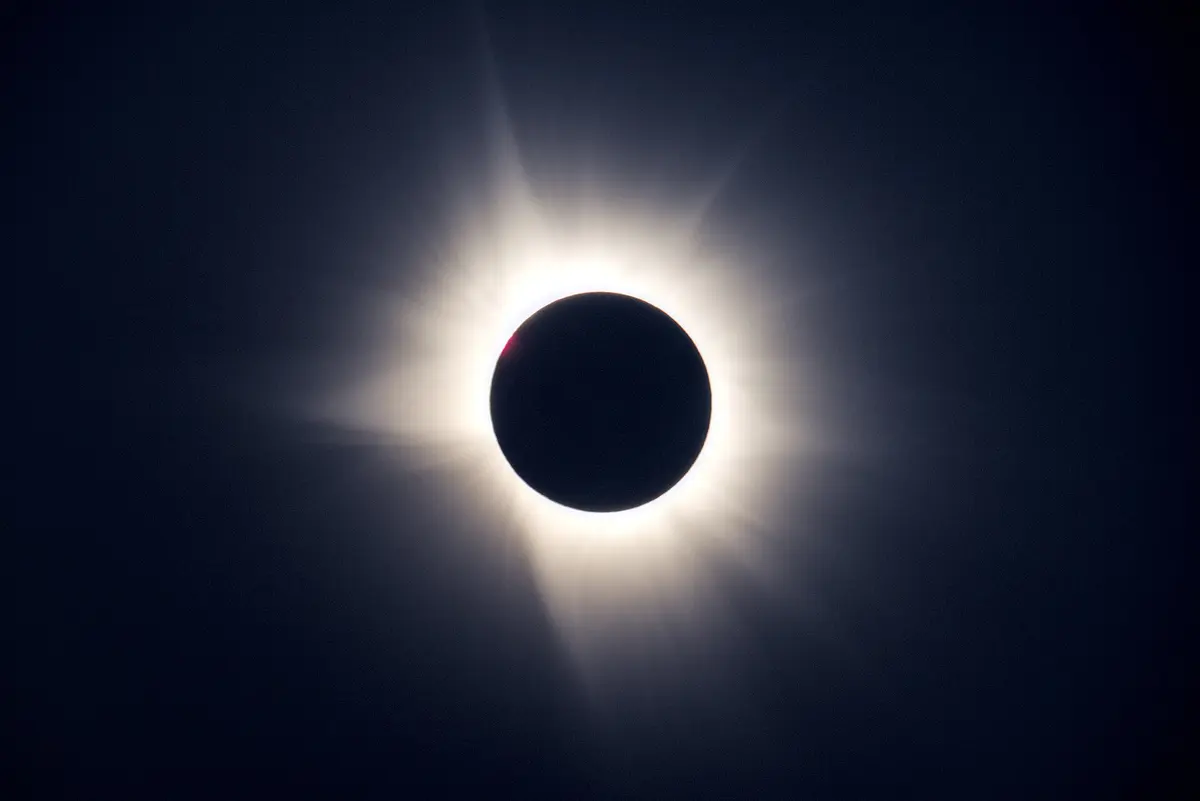
Two things make this one different. The first is time. Totality in Luxor lasts 6 minutes 20 seconds, in Sohag 6m 22s, at Bahariya 6m 17s. Compare that with 4m 28s at the very best of the 2024 North American eclipse, or 1m 48s in Spain in 2026. Six minutes is enough to run a full bracketed sequence at long focal length, swap to a wide lens, take a landscape frame, and still have a minute in hand to put the camera down. At 90 seconds none of that is possible.
The second is altitude. The Sun sits 79–83° above the horizon across the Egyptian path. Nothing on the ground can block it, atmospheric extinction and horizon murk are essentially eliminated, and the corona will be as clean and high-contrast as it ever gets. Compare 2026, where photographers in Spain will be fighting for a west-facing hilltop with the Sun 2–12° up and every kilometre of haze in the way.
The near-zenith problem: solve this at home, not in Egypt
An 80° Sun is wonderful for the eye and awkward for a tripod. Most ball heads cannot tilt that far without the lens fouling a leg; pan-and-tilt heads run out of travel; the camera ends up pointing at your own tripod; and with a long lens you cannot get your eye behind the viewfinder at all. Set your rig up at home, aim it 80° up, and find out. Solutions, roughly in order of cost: a sturdy head with a deep notch so the plate can drop vertically; a gimbal head, which handles steep angles naturally; an L-bracket or angled/offset bracket to move the lens away from the legs; a right-angle viewfinder or simply working off the rear screen; or an equatorial star tracker polar-aligned the night before, which both solves the geometry and keeps the Sun centred without you touching anything.
A footnote on the tracker: at Luxor’s latitude the polar axis points only about 25° above the northern horizon, so a tracker is easy to align there, and a tracked mount is the difference between spending totality composing and spending it recentring a drifting Sun every fifteen seconds. If you have one, bring it. If you do not, plan to nudge the mount between brackets and accept it.
Filters: the same rule as for your eyes
For every second of the partial phases (roughly 80 minutes before totality and 78 minutes after it), a full-aperture solar filter must be mounted on the front of the lens. Not behind it, not in a drop-in slot, not on the eyepiece. A front filter stops the concentrated sunlight before it can enter the optics, which protects the shutter, the sensor and, if you are using an optical viewfinder, your eye.
- Use a purpose-made white-light solar filter: coated polymer film or coated glass sold by a telescope or filter manufacturer, typically around ND 5 (transmitting about 0.001% of the light).
- Neutral-density photographic filters are not solar filters. Even a stacked 15-stop combination passes far too much light and does nothing about infrared, which will cook a shutter curtain. Variable NDs are worse still. This is the most common and most expensive mistake in eclipse photography.
- Make sure the filter cannot blow off. Tape it to the lens hood. Desert wind is real and a filter that departs while you are looking at the rear screen can destroy a camera in seconds.
- Practise the removal. At second contact the filter comes off in one movement, without knocking the aim off, and at third contact it goes back on immediately. Rehearse it until it takes two seconds in the dark.
- Cap or remove any finder scope, and never leave an unfiltered lens pointing at the Sun “just for a moment” while you fetch something.
The full reasoning, including why eyepiece-end filters are dangerous, is in the eye safety guide. Read it before you buy anything.
Focal length: how big do you want the Sun?
The Sun and Moon are each about half a degree across. The corona, however, extends several solar radii, and on a long eclipse with a quiet or active corona the outer streamers can reach further still. Choosing focal length is therefore a choice about how much corona you are prepared to lose.
- Up to 200 mm (full frame): the eclipsed Sun is a small disc in a large frame. Fine for context shots with landscape or a temple silhouette, disappointing as a portrait of the corona.
- 400–600 mm: the sweet spot on full frame. The disc is large enough to show prominences and inner-corona structure, with room around it for the streamers. A 600 mm on full frame, or a 400 mm on an APS-C body, is the standard eclipse-chaser answer.
- Beyond 800 mm: excellent for prominences, the chromosphere and Baily’s beads, but you will clip the outer corona, and any tracking or vibration error is magnified. Realistically a second-body option rather than your only lens.
- 14–35 mm: the landscape frame. Do not skip this: see below.
Two practical notes. On a crop-sensor body multiply by the crop factor (1.5× or 1.6×), so a 400 mm behaves like a 600–640 mm. And teleconverters cost you light and sharpness, which for the faint outer corona matters more than people expect; a bare 400 mm f/5.6 usually beats a 300 mm with a 1.4× on the same body.
Exposure: bracket, and bracket wider than you think
The corona spans an enormous brightness range: the inner corona next to the lunar limb is something like a million times brighter than the faintest outer streamers you can record. No single exposure captures it. Every good coronal image you have ever seen is a composite of many exposures blended in software. Your job on the day is therefore not to find the exposure, but to sweep a wide bracket across the whole range, several times.
| Subject | Filter | Shutter at ISO 100, f/8 |
|---|---|---|
| Partial phases | Full-aperture solar filter | 1/60 – 1/500 s |
| Diamond ring & Baily’s beads | None | 1/1000 – 1/4000 s |
| Chromosphere & prominences | None | 1/1000 – 1/500 s |
| Inner corona | None | 1/250 – 1/60 s |
| Middle corona | None | 1/30 – 1/8 s |
| Outer corona & streamers | None | 1/4 – 1 s |
| Earthshine on the lunar disc | None | 2 – 8 s |
| Wide landscape during totality | None | 1/15 – 1/2 s at f/2.8–f/4, ISO 400–1600 |
How to run it
- Shoot raw, always. There is no recoverable highlight or shadow headroom in a JPEG of a corona.
- Set the camera to manual exposure, manual focus, fixed white balance (daylight is fine) and disable auto ISO. Auto exposure, auto white balance and autofocus all misread a black sky with a brilliant ring in it.
- Use auto-exposure bracketing in long runs (many bodies will do ±3 EV in 1-stop steps, or 7 to 9 frames) and fire the whole run two or three times during totality. If your camera supports an intervalometer or a saved custom bracketing programme, set it up in advance so a single press produces the sequence.
- Keep the aperture fixed throughout. Changing it mid-sequence makes blending harder and risks nudging the lens.
- Focus on the Sun’s limb through the filter at maximum magnification on live view during the partial phases, then tape the focus ring and do not touch it. Autofocus in the dark will hunt and fail, and infinity on the barrel is rarely truly infinity.
- Use a remote release or a two-second timer; at 600 mm your finger is a vibration source.
The diamond ring and Baily’s beads
These last a couple of seconds each and are the most dramatic moments of the whole eclipse. They need fast shutter speeds and a burst: start firing about ten seconds before second contact, keep going through the ring, then stop and switch to your coronal bracket. At third contact do the reverse, and stop shooting the instant the ring is properly out: that is also the instant your solar filter goes back on and your eclipse glasses go back on your face.
Do not spend six minutes at 600 mm
The wide-angle frame is the one that people forget and later wish they had. During totality the sky overhead is deep twilight while a 360° band of orange sunset circles the entire horizon, an effect that no telephoto image can convey and that Egypt is beautifully set up for, because the Sun is so high that a wide lens can hold both the eclipsed Sun and the landscape without contortion.
- Put a second camera on a second tripod with a wide lens, pre-composed and pre-focused, and let it run on an intervalometer while you work the long lens. It costs you nothing during totality.
- Choose a foreground that says Egypt: a temple pylon, a colonnade, the river with feluccas, the west-bank cliffs, a line of palms, desert dunes. Access to major archaeological sites on the day may well be ticketed and controlled (see eclipse-day events), so have an alternative foreground that you can definitely reach.
- Consider a time-lapse or video of the shadow arriving and leaving, and of the light changing on the landscape. With the shadow moving fast across the desert, this is spectacular.
- Record sound. The reaction of the people around you at second contact is something you will want.
Smartphones: an honest assessment
Can a modern phone give you a good photograph of the corona? Honestly, no. The focal length is far too short, the disc will be a few pixels across, the automatic exposure will blow out the inner corona while crushing everything else, and computational night modes react unpredictably to a black sky with a bright ring in it. Attaching a phone to a telescope or using a clip-on lens usually produces frustration rather than results.
What a phone is good for: wide shots of the darkened landscape and the horizon glow; video of the crowd and the light change; a time-lapse of the whole event on a small tripod; and the partial phases held behind a spare pair of eclipse glasses (a genuinely effective trick, and safe, because the phone is doing the looking). Set exposure and focus manually by tapping and locking if your camera app allows it. Then put it away and use your eyes.
Budget at least two of your six minutes for looking
Every experienced eclipse chaser gives the same advice, and it is the advice most often ignored. Automate what you can, take the frames you planned in the first two-thirds of totality, then deliberately step away from the camera and watch the corona with your own eyes for the last two minutes. Photographs of totality are freely available from people with better equipment than yours, but the memory of having watched it yourself is not.
Dust, heat and the Egyptian working environment
Upper Egypt in August is about as reliably clear as anywhere on Earth (see the weather guide), but it is also hot, bright and dusty, and equipment suffers.
- Change lenses as little as possible, and never in wind. Better still, bring two bodies and do not change lenses at all on the day.
- Keep gear in sealed bags when not in use, with the bag closed rather than merely folded over. Fine sand finds zoom barrels and focus rings and stays there.
- Carry a rocket blower and a soft brush; never wipe grit off a lens with a cloth. Take spare microfibre cloths and lens tissue.
- Shade the camera between shots. A black body in direct 42°C sun climbs well above ambient, and heat triggers sensor noise, thermal shutdown on video, and rapid battery drain. A white towel over the rig is cheap and effective.
- Take more batteries than you need and keep them out of the sun. Take spare cards and format them beforehand.
- Watch for heat shimmer rising off stone and sand at long focal length. Setting up on grass, on a raised terrace or on a boat gives noticeably steadier seeing than standing on hot paving.
- Weight your tripod (a bag hung from the centre column), but do not let it swing in the wind.
- Bring a head torch, ideally with a red mode. You will be operating equipment in something close to deep twilight.
Rehearsal checklist
Could you improvise the whole sequence on the day? Not in six minutes, with your pulse up and the light collapsing around you. Run the whole thing at least twice at home, then once more in Egypt at the same time of day, before 2 August.
Weeks before, at home
- Mount the lens on the head and aim it 80° up. Confirm nothing fouls, the composition is reachable, and you can operate the controls in that position.
- Fit the solar filter and photograph the ordinary Sun. Establish your real partial-phase exposure with your filter, and confirm focus at maximum live-view magnification.
- Programme your bracketing sequence and, if available, save it to a custom mode. Time how long a full run takes.
- Practise removing and refitting the filter without moving the aim. Then practise it with your eyes shut.
- Photograph the full Moon at your intended focal length: it is the same angular size as the eclipsed Sun and shows you exactly what your framing will look like.
- Write a minute-by-minute script on a card: what happens, at what clock time, and what you do. Then delete half of it, because you will not do it all.
In Egypt, a day or two before
- Visit your site at the same hour the eclipse will happen. Check shade, ground, crowds, access and where a vehicle can wait.
- Set the whole rig up there and shoot the filtered Sun. Confirm your exposures in real Egyptian haze rather than at home.
- Confirm the exact contact times for your coordinates using the interactive map, and write them on the card: second contact, mid-eclipse, third contact.
- Set an alarm for 20 seconds before third contact. That is your cue to stop shooting, refit the filter and put your eclipse glasses back on.
- Charge everything. Format everything. Pack the night before, not on the morning.
Eclipse morning
- Be on site and set up by noon at the latest. Totality falls between 12:42 (Siwa) and 13:17 (Berenice) depending on where in Egypt you are (13:02 in Luxor).
- Shoot a few partial frames every ten minutes for a composite sequence, then leave the rig alone.
- Watch the light rather than the screen in the last ten minutes: shadow bands, sharpening shadows, the temperature drop, the approaching shadow on the western horizon.
- Filter off when the first diamond ring goes out. Run your sequence. Then stop, and look up.